The most efficient, reliable, and developer-friendly way to use the LinkedIn Profile API.
Actor page: apify.com/johnvc/linkedin-profile-api Input schema: apify.com/johnvc/linkedin-profile-api/input-schema
Send one or many public LinkedIn profile URLs and get back one clean JSON row per person: name, headline, location, current company and title, work experience, education, and follower counts. It is built API-first and MCP-ready, so you can call it from Python or drive it as a tool from an AI agent.
- Python 3.11 or higher
- An Apify account and API key (get a free key here)
-
Clone the repository
git clone https://github.com/johnisanerd/Apify-LinkedIn-Profile-API.git cd Apify-LinkedIn-Profile-API -
Install dependencies with UV
# Install UV if you do not have it:
curl -LsSf https://astral.sh/uv/install.sh | sh

# Install project dependencies:
uv sync
-
Configure your API key
cp .env.example .env
# Edit .env and add your Apify API key
# Get your free API key at: https://apify.com?fpr=9n7kx3
-
Run the example
uv run python linkedin-profile-api-example.py
export APIFY_API_TOKEN="your_api_key_here"
uv run python linkedin-profile-api-example.pyA URL in, structured data out. You never touch collection infrastructure. Pass a public profile URL and get flat, predictable fields you can load straight into a sheet, a database, or a CRM.
Batch friendly. Send up to 1000 profile URLs in one run. They are collected in parallel and returned one row each, so enriching a list is one call.
Pay per profile. Billing is per profile returned, with no per-run setup fee, so you only pay for what is delivered.
Reliable and predictable. Every profile comes back with the same field shape, and a URL that cannot be collected returns a clear error row instead of failing the whole run.
MCP-ready. Call it as a tool from Claude, Cursor, and other AI agents (see the install sections below).
- Collect one or many public LinkedIn person profiles by URL
- Name, headline, about, location, current company and title
- Full work experience and education history
- Follower and connection counts, profile photo URL, public profile URL
- One consistent JSON row per profile, every time
- A plain-language
summaryfield on every row for quick scanning and AI use - Clear per-URL error rows so a single bad link never sinks the batch
{
  "profileUrls": ["https://www.linkedin.com/in/satyanadella"]
}{
"profileUrls": [
"https://www.linkedin.com/in/satyanadella",
"https://www.linkedin.com/in/williamhgates"
]
}| Parameter | Type | Required | Default | Description |
|---|---|---|---|---|
profileUrls |
list[str] |
YES | - | One or more public LinkedIn /in/ profile URLs. Up to 1000 per run; non-/in/ URLs are skipped. |
Each profile is returned as one JSON row:
{
  "result_type": "profile",
  "name": "Satya Nadella",
  "headline": "Chairman and CEO at Microsoft",
  "currentCompany": "Microsoft",
  "currentTitle": "Chairman and CEO",
  "location": "Redmond, Washington, United States",
  "countryCode": "US",
  "followers": 12056751,
  "connections": 500,
  "pastCompanies": ["Microsoft", "University of Chicago", "Starbucks"],
  "education": [{ "title": "The University of Chicago Booth School of Business" }],
  "email": null,
  "publicUrl": "https://www.linkedin.com/in/satyanadella",
  "summary": "Chairman and CEO at Microsoft, based in Redmond, Washington, United States, 12,056,751 followers"
}
The email field is always null; email is not available from this source.
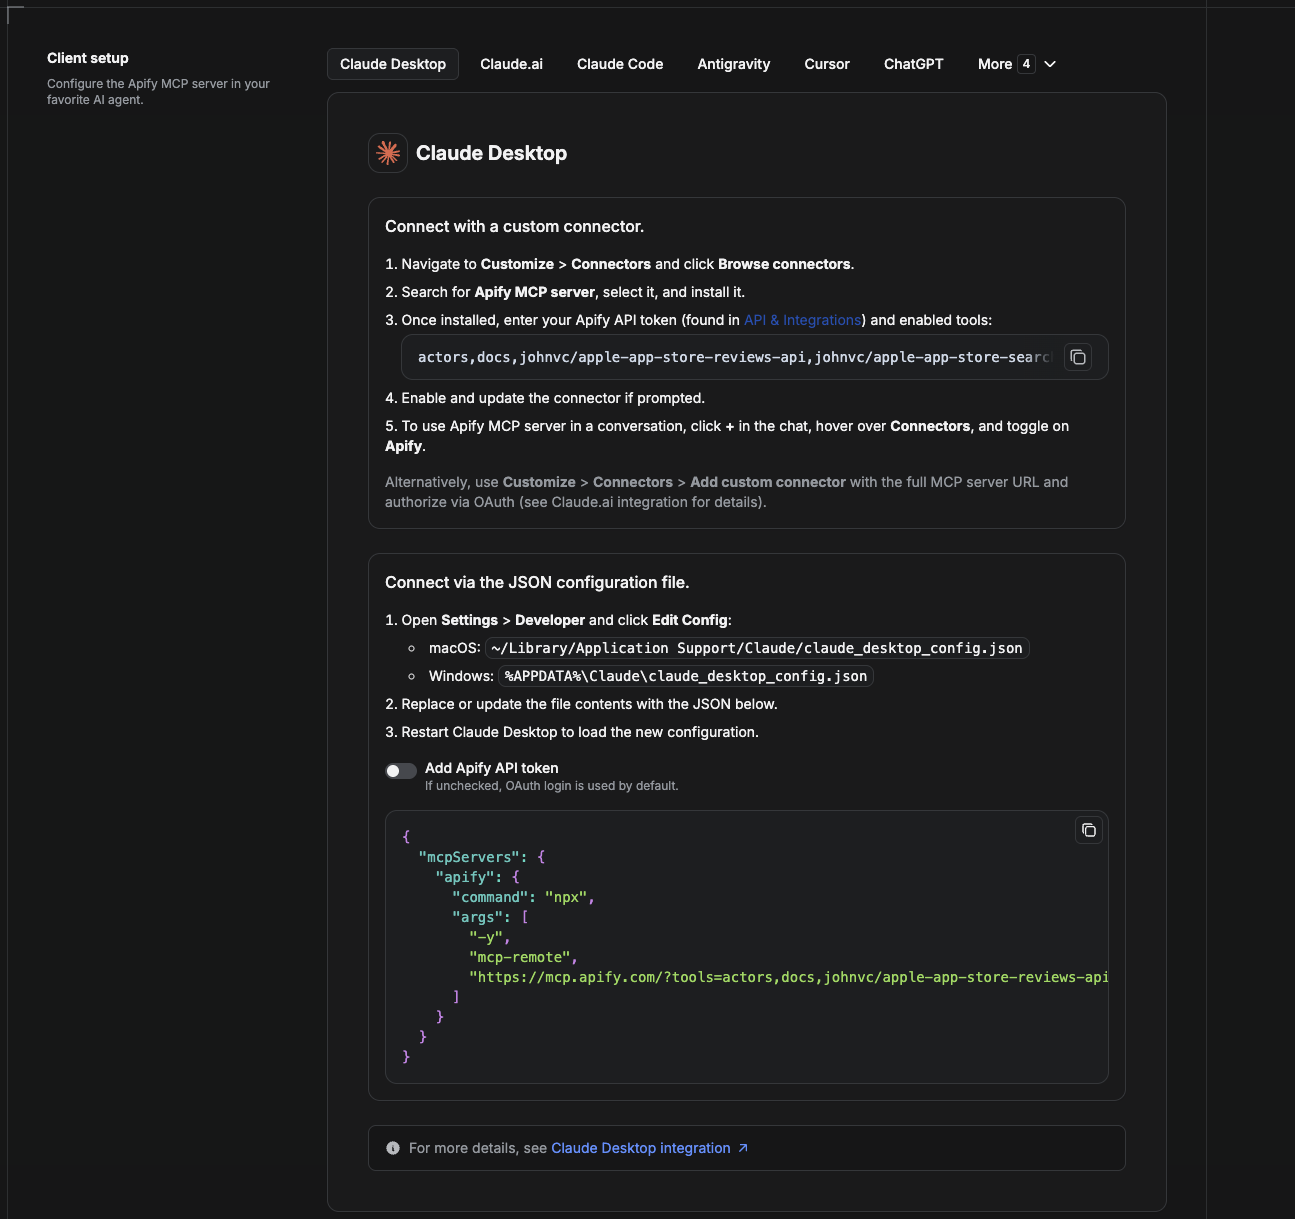
Cowork is the desktop app's automation mode. To give it the LinkedIn Profile API as a tool, add the Apify MCP server as a connector.
- Open the Claude desktop app and go to Settings → Connectors (or Settings → Developer → Edit Config to edit
claude_desktop_config.jsondirectly).- macOS:
~/Library/Application Support/Claude/claude_desktop_config.json - Windows:
%APPDATA%\Claude\claude_desktop_config.json
- macOS:
- Add the Apify MCP server, preloaded with only this Actor:
{
  "mcpServers": {
    "apify": {
      "command": "npx",
      "args": [
        "-y",
        "mcp-remote",
        "https://mcp.apify.com/?tools=actors,docs,johnvc/linkedin-profile-api"
      ]
    }
  }
}- Restart the app. When Cowork first calls the tool, complete the OAuth prompt in your browser, or add your Apify API token in the connector settings to skip OAuth.
- In a Cowork chat, confirm the tool is available and ask it to run the LinkedIn Profile API.
Download the desktop app and start a free trial: https://claude.ai/referral/uIlpa7nPLg More help: https://docs.apify.com/platform/integrations/claude-desktop
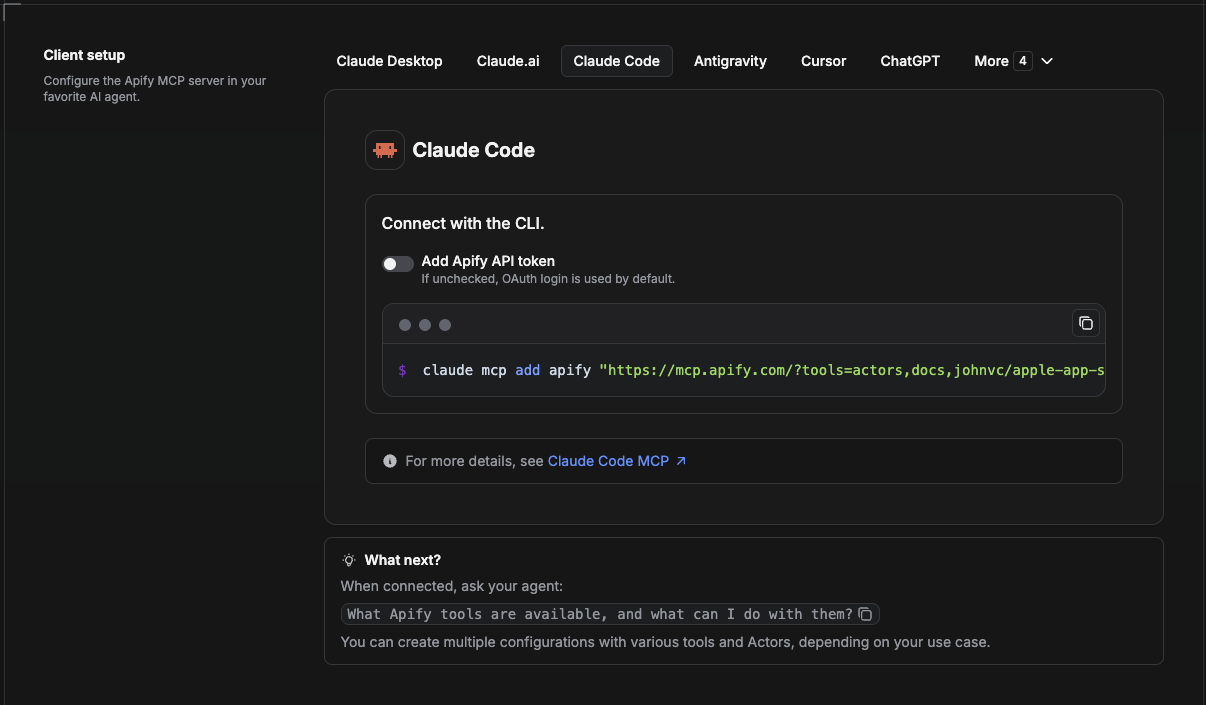
Claude Code is the command-line tool. Add the Actor's MCP server with one command:
claude mcp add --transport http apify \
  "https://mcp.apify.com/?tools=actors,docs,johnvc/linkedin-profile-api"
To use a token instead of browser OAuth:
claude mcp add --transport http apify \
  "https://mcp.apify.com/?tools=actors,docs,johnvc/linkedin-profile-api" \
  --header "Authorization: Bearer YOUR_APIFY_TOKEN"
Then verify with claude mcp list, or run /mcp inside a session. Ask Claude Code to call the LinkedIn Profile API.
Try Claude Code free: https://claude.ai/referral/uIlpa7nPLg Claude Code MCP docs: https://code.claude.com/docs/en/mcp
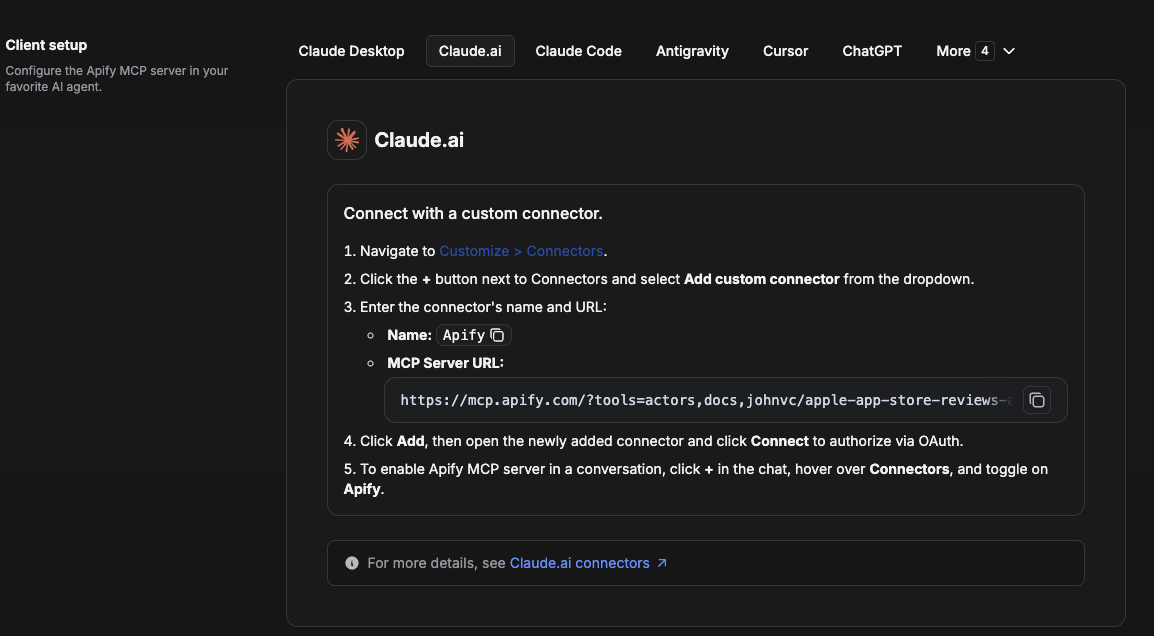
On claude.ai you add Apify as a connector, then enable just this Actor's tool.
- Go to Settings → Connectors → Browse connectors and search for Apify MCP server. Install it (enable or update if prompted).
- When connecting, authenticate with your Apify API token, and enable the tool
johnvc/linkedin-profile-api. - In any chat, open + → Connectors and turn on Apify.
- Alternatively, choose Add custom connector and paste the full MCP URL
https://mcp.apify.com/?tools=actors,docs,johnvc/linkedin-profile-api, using OAuth when prompted. - Ask Claude to run the LinkedIn Profile API.
Open Claude on the web: https://claude.ai
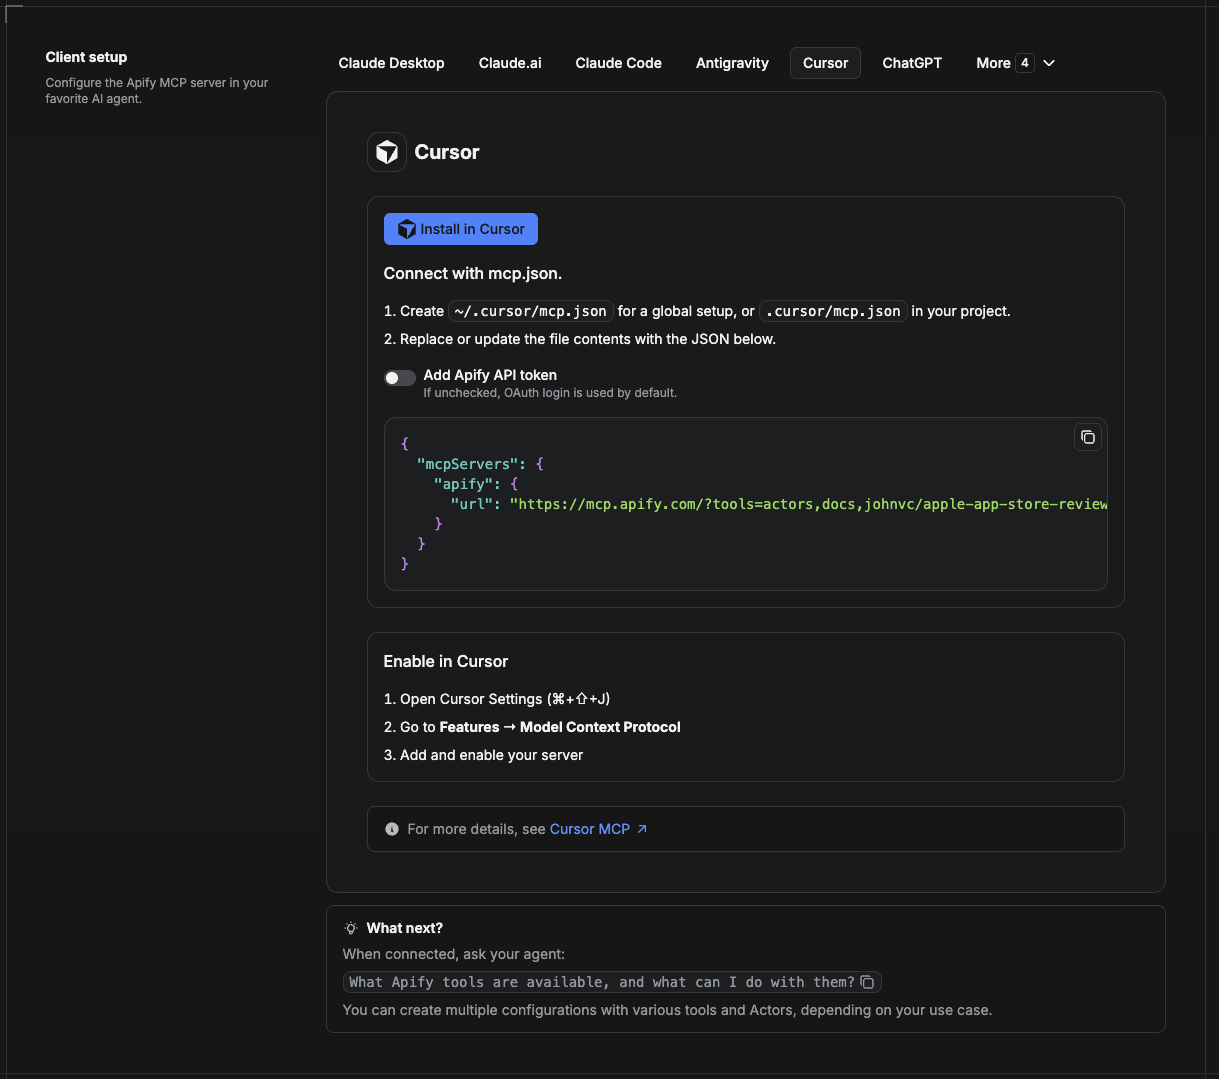
Cursor reads MCP servers from a project file at .cursor/mcp.json.
- In your project, create
.cursor/mcp.json:
{
  "mcpServers": {
    "apify": {
      "url": "https://mcp.apify.com/?tools=actors,docs,johnvc/linkedin-profile-api"
    }
  }
}- If you prefer token auth over browser OAuth, add a header:
{
  "mcpServers": {
    "apify": {
      "url": "https://mcp.apify.com/?tools=actors,docs,johnvc/linkedin-profile-api",
      "headers": { "Authorization": "Bearer YOUR_APIFY_TOKEN" }
    }
  }
}- Open Cursor → Settings → MCP and confirm the apify server is connected (green dot).
- In Composer or Chat, ask Cursor to call the LinkedIn Profile API.
New to Cursor? Get it here: https://cursor.com/referral?code=XQP4VBLI3NNX
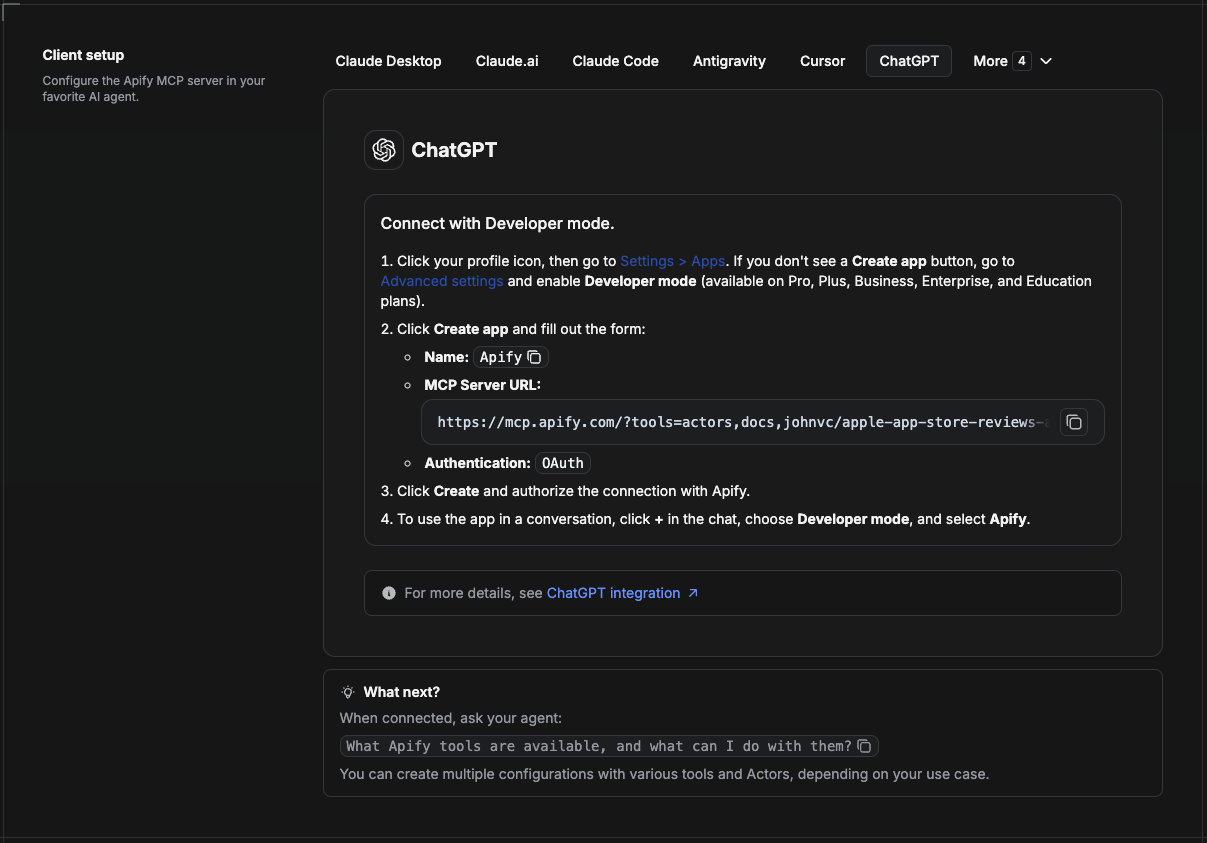
ChatGPT connects to the Apify MCP server through Developer mode (available on ChatGPT Pro, Plus, Business, Enterprise, and Education plans).
- Click your profile icon, then go to Settings > Apps. If you do not see a Create app button, open Advanced settings and enable Developer mode.
- Click Create app and fill out the form:
- Name: Apify
- MCP Server URL:
https://mcp.apify.com/?tools=actors,docs,johnvc/linkedin-profile-api - Authentication: OAuth
- Click Create and authorize the connection with Apify.
- To use the app in a conversation, click + in the chat, choose Developer mode, and select Apify.
More help: https://docs.apify.com/platform/integrations/mcp
Use the LinkedIn Profile API to power your data workflows with reliable, structured results.
Last Updated: 2026.07.10